Meet The Ogre!
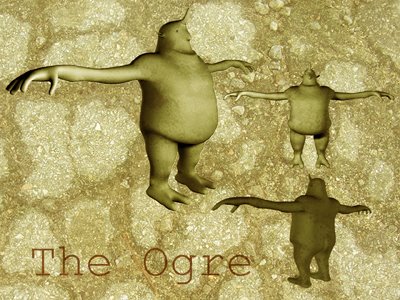
For this tutorial I'm using an ogre that I modeled, it's a simple design, very cartoon but good enough for the purpose. During this tutorial we'll be covering topics such as IK and FK, IK spline, weight paint, a little bit of bend shapes and some other stuff used for a complete biped body rig. I hope you like it, and lets get started!
Starting the Leg IK
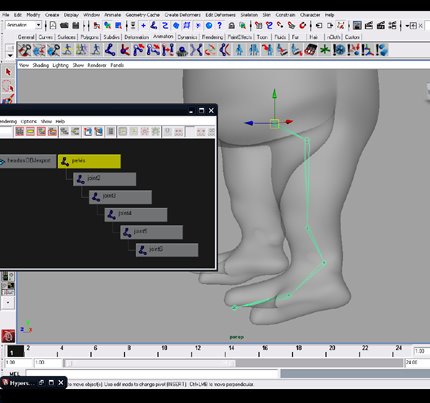
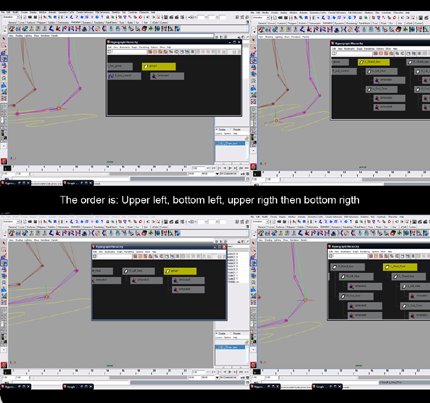
Well, the first thing I do is create the legs, starting with the IK, we have to create the joints and place them, name them as we see in the picture: ik_ pelvis,ik_ thigh,ik_ knee, ik_ankle,ik_ ball and ik_tip(or however you want to name them), then we orient them(except the pelvis) at the menu Skeleton, Orient Joints(For this case we put in hierachy), then we go to Skeleton, Mirror Joint, as ilustrated below, we do it in YZ.


Placing the IK handles
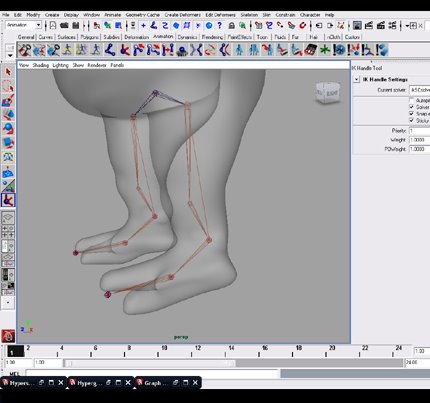
Now that we have our joints placed we grab the IK handle tool (you can find it in the Animation Shelf) and with its preferences set on : Sticky, with the solver enabled and using the RP solver (wich generates a Twist that controls the Knee), we make the connection between the ankle and the thigh. In the Hipergraph we can see the IK handle that was generated, but we have to do some more, we grab the IK handle tool again and with the SC solver we connect the ball and the ankle, then the tip and the ball. At this point we can create a control for our IK with a simple curve that we can shape (Is important for any control to have all its attributes in default, we can do this with the Freeze Transformations command that is in the Edit menu; the we make a group with it, so we move the group around, we do this in ALL the controls we create.)

Making some movement attributes
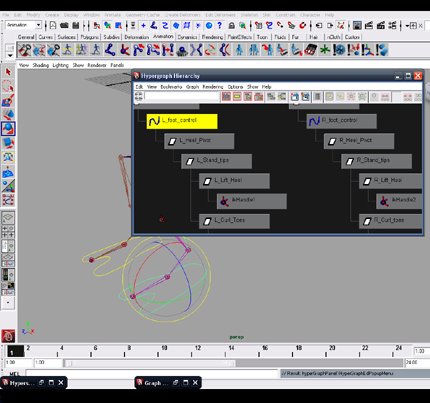
Now we are going to create some attributes to manage the some movements of the leg. First we grab the main IK handle and make a group with it, the pivot of is group has to be placed in the ball (This is going to be the Heel Lift), then, we grab the other two IK handles and put the in a group too, and its pivot is also going to be in the ball (This will be the Toe Curl), now, we grab the groups we just created and put them also in a group, with its pivot on the tip (This will be te Stand Tips and the Toe Pivot), and finally, we create anothe group with the last we did and move the pivot to the ankle (Now we can have a Heel Pivot). After doing that we place what we just created as a "child" of the control (we can parent it in the hypergraph by dragging it bellow the control with the middle mouse button or by selecting the child, then the parent and pressing P)
Connecting the attributes with the control
Now we are going to grab the control and rigth click over it, a menu dispalys and we have to go to the bottom where we will find "attribute" that will display another little window, in wich we have to select "add attribute" and create one for each of the movements that we mentioned before. Making the connection between the control attributes and the actual attributes is quite simple, in the hypergraph we rigth click over the control node and select one of the attributes, for example, Heel Pivot, and we connect it to its corresponding group, with the rotation on the axis that corresponds.
Making the knee control
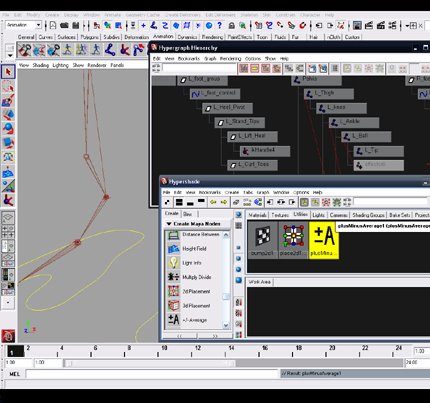
To control the knee we are going to use an utility called "plus average", that can be created on the hypershade. First we have to create two more attributes on the control, Knee and Offset. Now we have to select the primary IK handle, the control of the leg and the utility, all together, and in the hypershade we push the button for the input and output . Then we are going to connect the control in the by rigth clicking on it and selecting the knee attribute and drag it to the utility in the input 1, on cero, then the offset attribute to the input 1 on one, then the output 1 of the utility to the IK in the twist, and that should do it (Its a good idea to lock the offset after doing this becasue we don't have to move it.)
Creating the FK and the Bind for the Leg

Now that we have finished the leg we're moving foward with the FK, is very simple actually, just duplicate the joints and rename them to avoid confusions, also, delete the efectors that are also duplicated but don't actually do anything. Now, create controls for the FK_Thigh, FK_Knee, FK_Ankle and FK_Ball. To orient this controls properly first select the joint that corresponds to the control and then the group of the control and use an orient constrain without mantein offset, this will move the control( remember that using the control vertex of the control you can put it or shape it in any way that you like without affecting the attributes of the control), then erase the constrain that is created in the hypergraph and do another orient constrain, selecting the control, not it's group, and then the joint. When you do this with all the joints and their controls parent them in a hierachy and that's it for the FK.
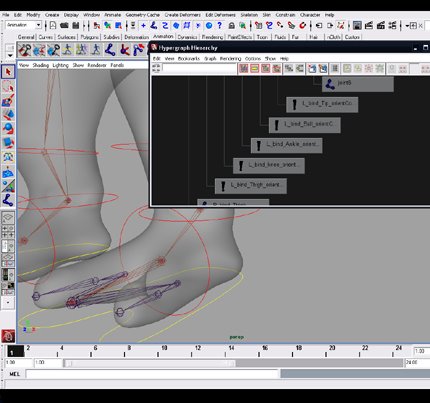
Now for the bind we have to duplicate the joints again, rename them and create the fingers, they are going to be connected to the Tip. Now what we are going to do is constrain the IK and FK with the Bind; for doing this we grab, for example, the IK thigh and the FK thigh and to a parent constrain, then the same with the others, and also the same with the Fk. Now the only remaining thing that we have to do is create a switch for using the IK or the FK
The Switch for IK and FK
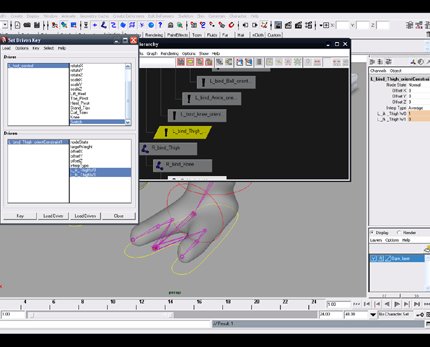
For the switch we're using a Set Driven Key, wich can be found in the Animate menu on top. We have to create another attribute in the control called "Switch", this one needs 0 as minimun and 10 as maximun (this values can be as you want, this are just comfortable.), then, with te control selected, in the set driven key window we load the driver, wich will place the contol as the driver, and at the rigth side we have to select the Switch attribute. Now, we choose one of the constrains that we created (They are below the Bind joints in the hypergraph), and load this as the driven, then select in the rigth side of it the ik and fk stuff that you see. You can see that the ik and fk are both in 1, that means that they have 100% of influence, so, we can put the FK in 0 and let the IK in 1, then select the driver, and with the Switch value on 0 hit "Key" , then change the value to 10, select the drivens and invert the values, FK on 1, IK 0, select the driver again and hit "Key", and repeat this process with all the constrains. When you're done you should have a couple of fully functional legs!
Starting the Arm's IK
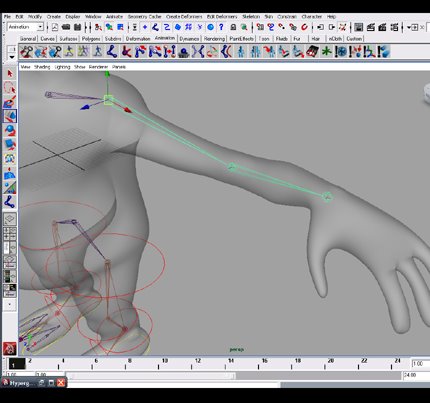
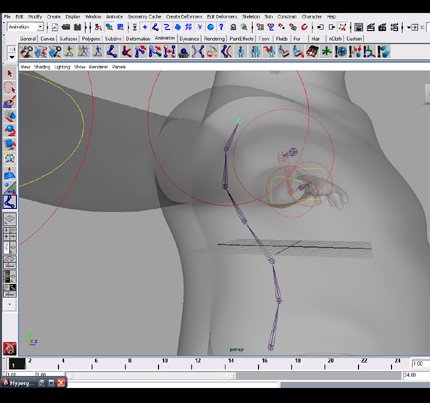
Now that we have completed our legs we can proceed with the arms. First create, name, position and orient ( except the clavicle, and by the way, the orientation of the wrist is diferent, "Z" is facing up) the joints of the arm: the clavicle, shoulder, elbow and wrist. We also need another joint for the forearm, so what we will do is "ctrl+d" the elbow joint and "w+rigth click", then we select the option "object" so we preserve the same orientation, then we erase the wrist joint that is also duplicated and order the heriachy of the joints we have. Now we create the IK handle between the shoulder and the forearm.


Now, we have to move the pivot of the IK to the wrist, so, to do that we are going to Modify/ Evaluate Nodes/ Ignore All, and now with the key "Insert" on the keyboard we can move the IK's pivot , also, in the hypergraph, we have to grab the effector and move it's pivot to the wrist as well, the go to the Nodes menu and select Evaluate All. Now we create a control for the IK, parent the IK handle to it, and also we orient constrain the wrist joint to it so we can have rotation in our IK, also, we want to orient constrain the forearm joint to the control but ONLY an X.

The last thing to do in for the arm's IK is control for the elbow. We are going to create a control and put it a little bit behind the elbow, then we coudl duplicate the joints just to use them as a guide; now we have to select the control, then the IK handle and use a constrain pole vector; this will move the joints out of place, but by moving the group of the control we just made, we can fit the joints to the guide, once this is done we can delete the guide, and that is all for the arm's IK

The arm's FK and Bind
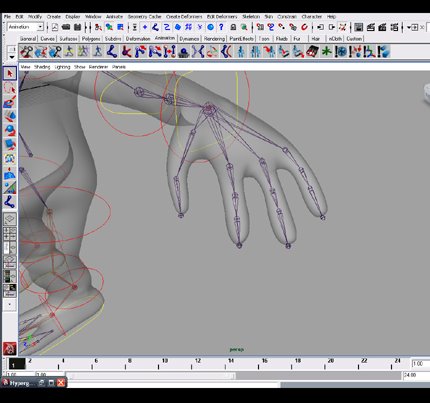
For the Fk we duplicate the joints and do the same thing we did in the leg, with controls in the shoulder, elbow and wrist, with the only difference that we have to make a orient constrain between the forearm joint and the wrist control but ONLY in X.. For the Bind we duplicate again the joints, we place the controls for the clavicles( one for every side) , also, we create the fingers and a new control that is not going to have any movement, is just for the switch and some other attributes of the finger thar we are going to create with the "Set Driven Key" (Like, fist, relax hand, point, etc.), we just parent constrain it to the bind wrist joint( the pivot of this control must be in the wrist, you can move it away a little with the control vertex). We connect the IK and FK to the bind as we did in the legs, the same for the switch, just that our driver is going to be this hand control that we created , and then you should have a fully functional arm


Making the Spine
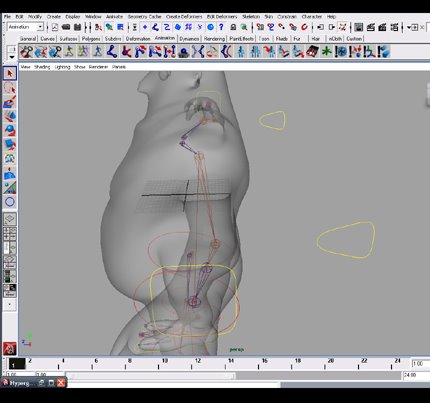
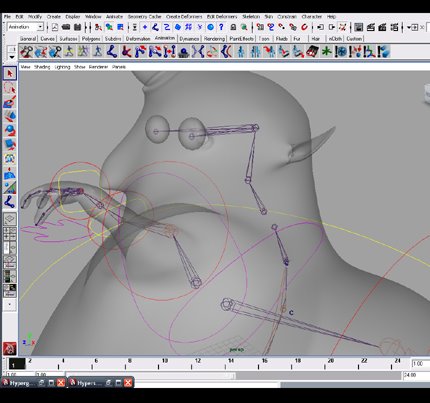
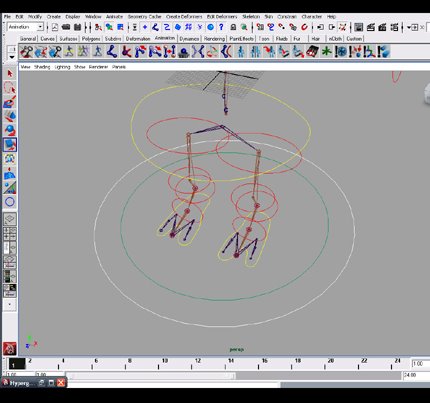
Fiirst, we have to place the joints and orient and name, they should be curved as you can see in the image. Now we're using a different kind of IK, the IK Spline, check that it's settings are all on(don't worry about the ones in grey, leave them like that) and we are going to need the spans in 2. This IK should go from the base of the Spine to the base of the neck. In the hypergraph, rigth next to the IK handle appears a curve, with its control vertex we control the spine, so, we are going to select each one a go to Create Deformers/ Cluster, this will create a "C" in the vertex, and now we can animate with them, but this isn't very comfortable, so we can create controllers for them, but just on for the top, wich will hold as a parent the two top ones, and one for the bottom that does the same for the bottom two bottom ones. Now, for the cluster in the center we are goin to parent constrain it to the top and bottom control.


Controlling the twist of the Spine
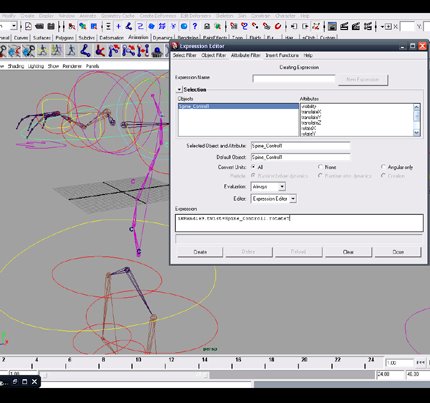
To do this we need an expresion, so we go to our Expression Editor and with the IK handle selected in the left side, we select it's twist on the rigth side, and copy the information that is generated. Next we select the top controller so it appears in the left and then select it's rotate y in the rigth. We paste what we copied before and do a equal sing, then after the sing we paste the new information and that's it .
Head and Neck
We create the joints and what we always have done so far with the joints, then we create a control for the base of the neck and connectec it like this: we select the last joint of the spine and the group of this control and make a parent constrain, then the first joint of the neck and the control(not the group) and do a parent constrain.
Connecting everything together
We're getting close to the end, so we can put everything togehter. First we have to connect the Pelvis to the spine, so we take the joint of the pelvis and the control of the base of the spine and do a parent constrain( with the control as the parent of course), now we connect the arms to the spine by taking the group of the control of clavicle and the joint of the spine that is somehow lined up to the control and make a parent constrain with the spine as the parent.
Now we create a master control on the bottom of the object that will be the parent of the following: we put each group of the IK controls of the feet as a child with an ordinary parent , then we do the same with the hands, and finally with the pelvis, five connections. Another thing that we should do is a placer, a control that won't be animated, only used to place the character in the scene; we jus create another control and put the master control as a child of this placer.
The Roll Solver
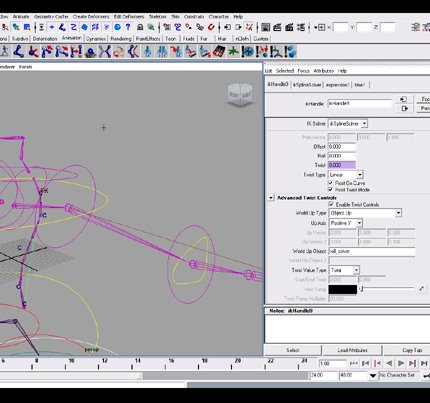
Another thing that's important is fix a problem that the IK Spline does by default in the roll, so, we have to create a locator and place it back and a little uo from the model, the locator must be in a group, we can name this locator "roll_solver"; now we put it as a child of spine base control. We go to the attributes of the IK spline and scroll down to IK Solver/ we enable the twist controls/ "world up type" with "object up"/ "world up object" we place the name of the locator we did and that should do it.
Binding the skin and doing the weight paint

We have completed our rig, now we can bind the skin, and for doing this we are going to select the bind joints of arms and legs, skipping the tips, we also select the joints of clavicles and pelvis and go to Skin/ Bind Skin/ for the binding mode we select "selected joints", also"closest distance" and the do the bind skin.
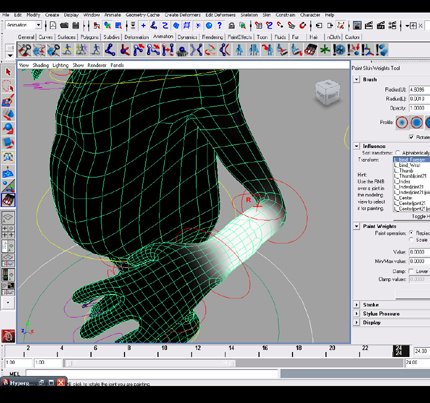
The Weight paint is about testing until we are satisfied with the deformations we have, don't worry, you'll never get it perfect with just the weight paint. The controls for the weight paint are Replace, wich replaces the quantity of influence you place over a joint, Add, which adds influence, Smooth, the softens the transitions (with the smooth selected you can click on the Flood option, this will soften everything, it's quite usefull) and the others... don't really bother about them.

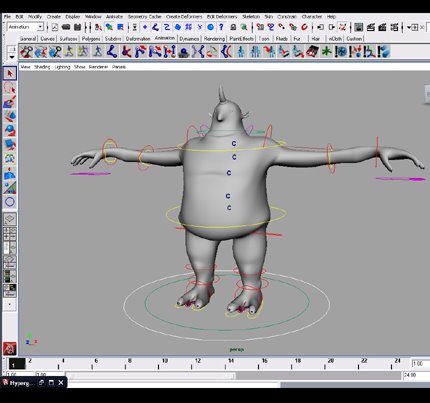
The Completed Rig!
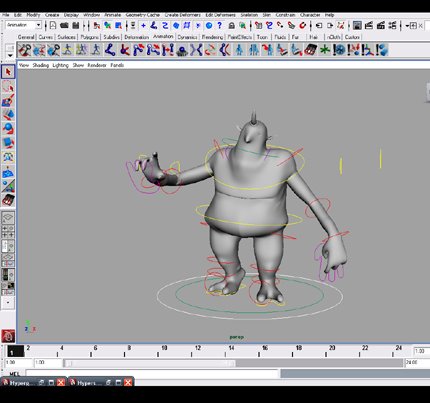
Now, with everything done we can do the last little tweaks, we place all the joints in one group, then the controls in another, and the same for the geometry. Finally we place everything in one group, the group of the character, all this just for order. Well, now our rig is completed and functional, I hope you have enjoyed this tutorial and that it helps you moving foward with your rigs, bye!!!